
Six Easy Steps To Home Allergy Testing
When you use an Imutest Test Kit it takes just 30 minutes to determine if you test positive for an allergy. And it’s so easy to use, as you can see below –

No 1: It’s a Simple Finger Prick!
You will notice a blue protective cover over the lancet, so twist to remove this cover. With your free hand, hold the indented side grips of the pricker between your thumb and forefinger. Firmly press the white contact piece against the soft pad of your finger tip until you hear a click.

No 2: Collecting the Blood Sample
Gently massage your finger towards the fingertip until a droplet of blood appears. The collection tube should be placed directly onto the blood droplet and allowed to automatically fill to the mark.
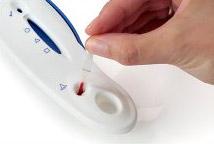
No 3: Placing the Sample
The tip of the collection tube should be placed into the smaller well, which is marked by a “blood drop” symbol. The blood sample will be automatically absorbed into the pad.
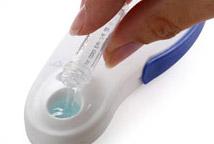
No 4: Adding the Developer Solution
Time to add the developer solution. Remove the screw top and pour the solution into the larger unmarked well. Wait for 15 minutes.
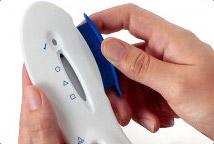
No 5: Activating the Test
Once 15 minutes have passed, activate the test device by completely pulling out the blue slider. Wait another 15 minutes.
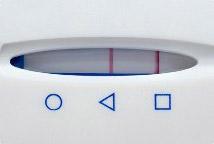
No 6: Time to Check Your Results!
After the second 15 minutes have passed your test results will be ready. To determine the results of your test you should consult the pamphlet titled ‘Instructions for Use’ which was included in your Imutest Allergy Kit.
Imutest Allergy Kits have been specifically designed for people to use in the comfort and privacy of their own home. Should your test reveal a positive result we strongly suggest you visit your local healthcare practitioner to discuss the results. You can now take appropriate action to reduce or even eliminate your allergy symptoms.